Full guide
Every option, explained
Where everything is, what every option does, and your first video — in the order you'll need them. Every section has a button that opens that exact tool.
Where is the AI Studio?
Videos, characters and pictures are all made in the AI Studio. Create Audio is the simple narration-only tool, and Dashboard is your account — videos aren't made there.
Your first video in 4 steps
The Studio opens on Video → Full video, ready to go. You don't have to touch any other option the first time.
- 1Paste your story
Into the big box. No story yet? Press Use this story under the box, or the sparkle ✦ → Write me a story.
- 2Add your character
Click the picture button 🖼 right of the box → + Add character, upload its picture and name it. It stays the same in every scene. No picture? Skip this and the AI designs one. More
- 3Pick a voice
In the options on the left (on a phone, tap Settings). Tap ▶ to hear one first.
- 4Press Generate
The director plans the scenes, then your video renders by itself. Watch it under Your creations.
On a computer, the ? beside the AI Studio title gives a 30-second tour of the screen.
Make my first videoPick the right tool
Three tabs at the top — Audio Video Image — and four Video tools on the left. Choose by what you want to end up with:
Your whole story as an animated, narrated video.
- You give:
- A story or script
- You get:
- An MP4 with narration, music and the same characters in every scene
One short clip of one moment.
- You give:
- One action, in a sentence
- You get:
- A short silent clip
Bring your own drawing to life.
- You give:
- Your picture + how it moves
- You get:
- A short clip — it can even say a line
Turn your photos and audio into a video.
- You give:
- Up to 30 pictures + one audio file
- You get:
- A video with gentle camera moves and optional subtitles
Narration only — no pictures.
- You give:
- Your text
- You get:
- An MP3 read in the voice you pick
Illustrations and coloring pages.
- You give:
- A description
- You get:
- A picture to download or print
The Studio, mapped
- 1Video tools. Full video, Single scene, Animate art and Manual Video — see which one to pick.
- 2Engine. Full video lists the lanes your plan includes — no credits: Unlimited Director's Cut (Creator and up), Unlimited Premiere in 720p HD (Pro and up), Unlimited Ultra in 1080p (Studio). On Single scene, More engines opens the per-clip credit engines.
- 3Format. Shorts · 9:16 (up to 3 min — TikTok, Reels, YouTube Shorts) or Long · 16:9 (3–10 min — YouTube). Pick before you generate — it shapes every scene.
- 4Characters. Your saved cast. Tap a character to put them in this story (up to 6), None for AI-designed characters, + New to create one.
- 5Camera, Music, Art style, Voice. Scroll the left side for the rest of the options — all explained below.
- 6Audio · Video · Image. The three Studios. Switching changes the options on the left and the box below.
- 7Story box. Paste your story or script — three sentences or a full production doc both work. When it's empty, Use this story under it fills in the example from our homepage film.
- 8Picture button. Your characters live here — upload a picture, name it, save it. Step by step below.
- 9AI writing tools. The sparkle: Write me a story, Surprise me, Improve my text, plus Story settings for age group, story length and story language.
- 10Generate. Starts your video. The director plans the scenes, then rendering begins on its own.
- 11Your creations. Everything you have made, newest first, with live progress while a video renders.
Add your characters
Upload a picture of your character once and it stays the same in every scene — up to 6 per story, saved to your account for next time.
Way 1 · the picture button (Full video)
- 1Click the picture button 🖼 right of the story box. A panel opens: Your characters.
- 2Press + Add character 1 of 6 and choose the picture.
- 3Type its name — “Ella” — and press Save character.
- 4Repeat for each character. Under each name, pick the voice it speaks with.
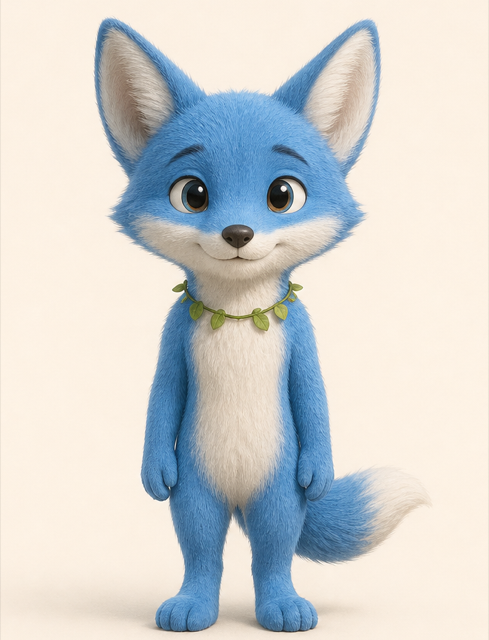
Finn
Character 1 · in your cast
Kid Girl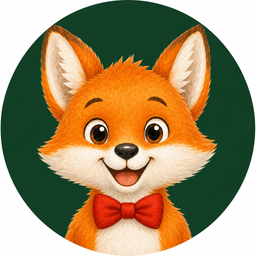
Milo
Character 2 · in your cast
Auto voiceAdd character 3 of 6
Upload a picture, then name it
Way 2 · + New in the Characters row (left side)
- 1Press + New in the Characters row.
- 2Type a Name.
- 3Press Upload your own art (free) — or Describe your character and we draw it for you (400 credits).
- 4Pick the Voice that speaks its lines, then save. Tap the character in the row to put it in this story; tap None to let the AI design characters.
New character
Name
Describe your character
Voice (speaks this character's lines)
✓ One character, plain background
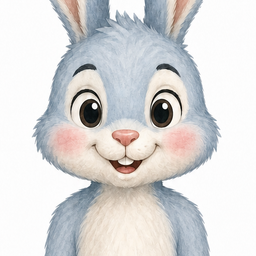
✕ Crammed into one picture
- ✓One character per picture, facing forward, full body if you have it
- ✓A plain or simple background — the character fills the frame
- ✓Illustrated, 3D or hand-drawn characters all work
- ✓Several characters? One picture each works best (one picture holding 2–6 also works)
- ✓Use the exact name in your story — that's how each scene knows who's in it
- ✕Photos of real children — they are not allowed and are removed
- ✕Busy scenes, heavy filters, or text over the picture
- ✕Calling a character “the fox” halfway through — keep the name
- ✕Famous cartoon characters — they come out different on purpose
On Single scene and Image, the same picture button adds one reference picture for that creation. On Animate art, the square on the left of the box takes your drawing.
Add my charactersVoices, and characters that talk
The Voice list is in the options on the left. Tap a name to choose it, tap ▶ to hear it. This voice is the narrator.
- Kids Voices · 21Kid narrators in 19 languages — Kid Girl, Baby, Kid British, Kid Spanish…
- Storytelling Voices · 12Warm English storytellers — US, UK, Australian, Indian and Irish accents.
- Expressive Voices · 8Natural and expressive — they read any language you write in.
- Narration Voices · 10Character narrators — Calm Mom, Bedtime Whisper, Story Grandpa…
- Language Voices · 16Native adult narrators in Spanish, French, German, Portuguese, Italian, Korean.
Voice
Story is in Spanish, this voice speaks English — pick a Spanish voice below.
Characters speak their lines
With characters added, each one can speak in its own voice instead of the narrator reading everything. It's on by default — the Characters speak their lines tick in the picture-button panel. Untick it and one narrator reads the whole story.
Write your script like this
Milo finds a jar of cookies in the kitchen.
Milo: Who ate all the cookies?
Bruno: Not me! Maybe it was a cookie monster.
Luna: Then why are there crumbs on your nose?
- ✓Each spoken line on its own row, as Name: line — with the character's exact name
- ✓Rows without a name are read by the narrator
- ✓Only lines and no narrator rows? Then there is no narrator at all
- ✓Quotes in a story work too: “Look!” said Milo — Milo says it
- ✓Works in every language
Make it look and sound right
Every option on the left has a good default — change only what you care about.
Format
Shorts for phones, Long for YouTube.
Camera move
Auto lets the director choose per scene — usually best. Locked keeps the camera still.
Music
Tap ▶ on a mood to hear it first.
Art style
The look of every scene.
Picture quality
Low, Medium or High — sharper, more detailed scene pictures.
Engine
Full video shows the lanes your plan includes — no credits. Pro adds 720p HD and priority, Studio adds full 1080p.
After you press Generate
- 1You'll see Directing your story… while the director plans every scene — about a minute, longer for long stories.
- 2Then it starts rendering by itself. Nothing else to click.
- 3Close the page if you like — it keeps going, and we email you when it's ready.
- 4Already have a video rendering? The new one waits its turn and starts right after.
| Plan | Scenes rendered per day |
|---|---|
| Creator | 20 |
| Pro | 20 |
| Studio | 30 |
The other tools
Each card opens that tool directly.
- 1Describe one action in the box (up to 500 characters) — “the fox jumps over a puddle”.
- 2Put what should NOT happen in Avoid — “talking, extra characters”.
- 3Tick Only this motion to keep everything else still; pick the Locked camera to freeze the camera too.
- 4Optional: the picture button adds a character picture. The clip is silent.
- 1Click the square on the left and upload your drawing.
- 2Describe how it moves — “waves hello and giggles, then claps” (up to 200 characters).
- 3Optional: in the 💬 box, a line for it to say, in any language. It speaks in the voice chosen on the left; on the Studio plan its mouth moves with the words. Leave it empty for a silent clip.
- 1Press + to add up to 30 pictures, in order.
- 2Press Add an audio file — your narration or a song.
- 3Turn on Subtitles to write your audio on screen. Camera move and music work here too.
- 1Switch to the Audio tab and paste your text.
- 2Pick a voice; adjust Pitch and Narration speed if you like (Expressive voices have no pitch).
- 3Press Generate — an MP3 you can download.
- 1Switch to the Image tab and describe the picture.
- 2Choose an Engine (each shows its credits per picture), a Style — Cinematic 3D, Watercolor, Cartoon, Storybook, Coloring Page — and Aspect ratio 2:3, 1:1 or 16:9.
- 3The picture button adds a reference so your character looks the same.
- 1Click the sparkle ✦ next to the picture button.
- 2Set Age group, Story length and Story language.
- 3Write me a story from your idea, Surprise me for a random one, or Improve my text to polish yours.
Your creations
Everything you make appears under Your creations, newest first, in the tab you made it in. On Video, filter by All Full videos Single scenes.
- ✓While a video renders, its card shows the progress — leave and come back any time
- ✓Hover a finished video (or look at its corner on a phone): ⬇ downloads it, ⤢ opens it big
- ✓If a render fails, the card says so — nothing extra is charged and anything paid is refunded
Ready — ⬇ downloads it
Scene 7 of 12
Still rendering — it keeps going even if you leave